How do I block or unfilter a specific app or website?
How do I block or unfilter a specific
app or website?
Canopy allows you to customize your shield’s personal protection settings by creating Custom Filtering Rules.
With this feature, you can allow or block access to specific websites or apps, before or after your shield installs them on their device.
To create a Custom Filtering Rule for a specific app:
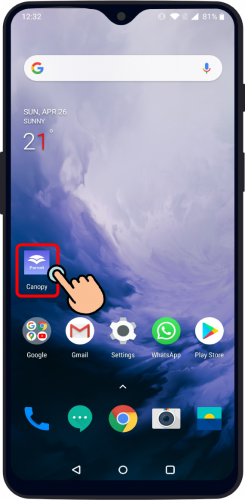
- Open the Canopy for Parents app on your device or log in to the Canopy web dashboard.
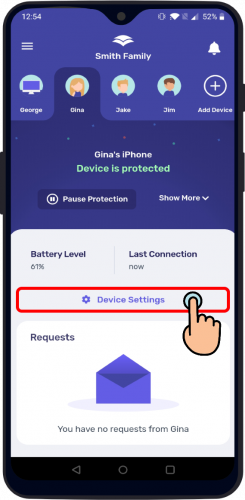
- Select the profile of the shield for whom you wish to block or allow an app. Click Device Settings on the app or Protection Settings on the web dashboard.
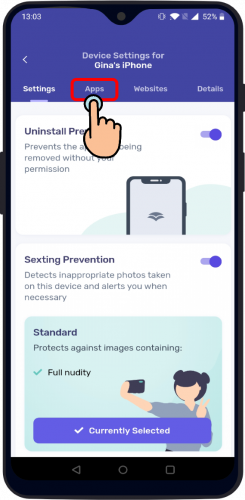
- Select the Advanved Filtering tab
- Click Applications (or Apps if you’re on the Canopy for Parents app).
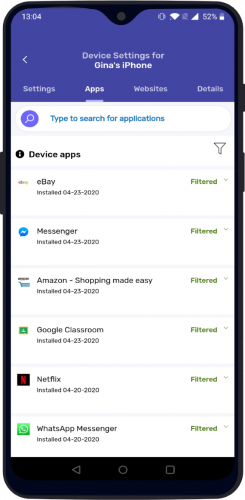
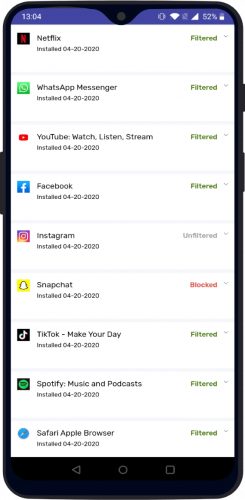
- The next screen will display a list of all the applications installed on your shield’s device. You can sort the list alphabetically, by most used, or by date downloaded by pressing the Sort button.
- Locate the application you wish to block or allow. You can do so by scrolling down the app list or by entering the unique app name in the search box located on the top of the screen.
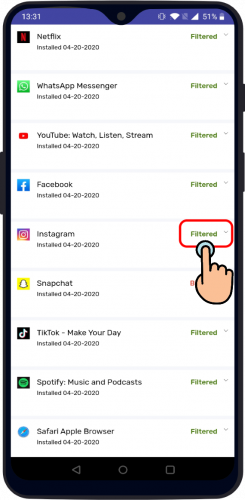
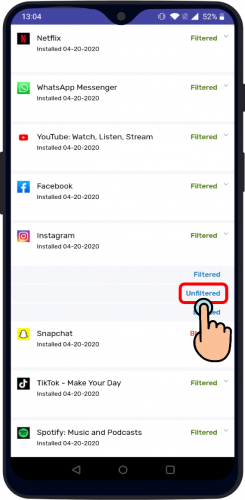
- From the drop-down menu on the right side of the screen, choose the level of protection you want for the app you’ve selected.
Unfiltered means Canopy will not filter any content within the app.
Blocked means Canopy will completely prevent your shield from accessing the app.


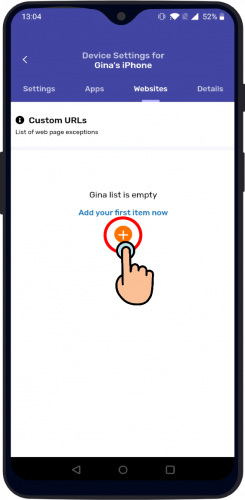
To create a Custom Filtering Rule for a specific website:
- Open the Canopy for Parents app on your device or log in to the Canopy web dashboard.
- Select the profile of the shield for whom you wish to block or allow a website. Click Device Settings on the app or Protection Settings on the web dashboard.
- Select the Advanved Filtering tab
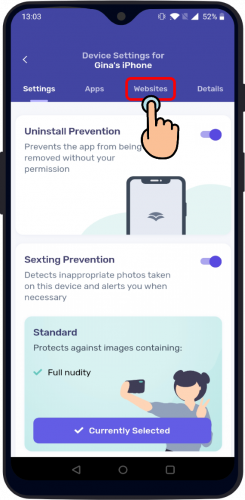
- Click Websites.
- Click the + icon to add a new website.
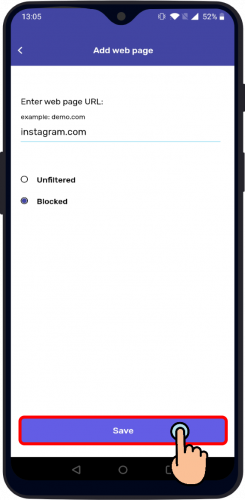
- Select a level of protection:
Unfiltered means Canopy will not filter any content within the website.
Blocked means Canopy will completely prevent your shield from accessing the website.
- Click Add Website.
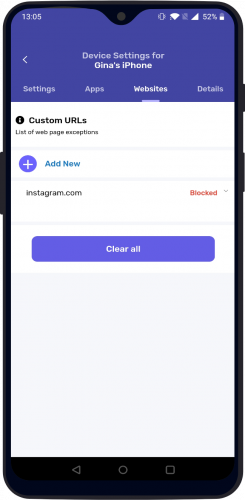
To return to filtering a blocked or unfiltered site normally, just delete it from your list by clicking Remove.
Related Articles
Enhanced App Management
In our continuous effort to optimize user experience while maintaining the highest standards of security, we are thrilled to introduce the Enhanced App Management feature for Canopy users. This innovative feature ensures a seamless integration of ...Canopy Shield App - Chromebook
Sign Up & Install: How do I Install Canopy Shield App on Chromebook? To install the Canopy Shield app on your Chromebook, please follow these steps: Share an Installation link from the Canopy App or Dashboard to your Chromebook. (You can also find ...Allow accessibility- Android 13
Canopy Shield Installation: Allow Accessibility on Android 13 An update to Android 13 restricts permissions for appsoutside Google Play that require Accessibility access To allow permission for Netspark after downloading, please follow these simple ...Install Canopy App on iOS
Sign Up & Install: Install Canopy App on iOS The Canopy app allows you to manage your Canopy account, monitor your protected devices’s activities, customize settings, and receive helpful notifications – all from your personal device. To install the ...Does Canopy have two different apps?
Does Canopy have two different apps? Yes, Canopy and Canopy Shield. While they might seem similar at first, they serve different purposes. If you’re new to Canopy, you should start by creating your account and installing Canopy Shield on the devices ...